Tuesday, January 22, 2013

My Secret DIY Advantage is YOUR secret DIY advantage (sorta)


SO I have an unfair advantage over most DIY designer types in that my husband is a contractor. SCORE!

Yeah but in all fairness he wasn't a contractor when we got married. Infact, when we got married he was in the oilfield like so many people around here. Wasting his life away on fat paychecks and mucho machismo in the workplace. I kinda miss those paychecks but I'm completely to blame so I don't chirp too loudly.

You see we started working around the house. I had visions of what I wanted to see happening. I wanted to see walls moved. Closets turned into entrances, spare bedrooms turned into media rooms and all kinds of junk that would just appear out of no where. So he obliged me with the first little job we had on the docket "The Door" that previously did not exist and would need to exist to seperate the upstairs from the downstairs spaces.

Part of our renovation plan was to have renters in our basement to off-set the mortgage/costs of renovating and it was a brilliant plan except for the entrance. The back door came directly in past the kitchen and it was very awkward.

Super awkward.

Also the backdoor was kinda creepy. It was a 60 year old wood door with an old wood screen door attached. It banged when it shut and it had a wicked haunted house creek.

So I went to the re-store and I picked up a modern metal door with a full glass insert for 60.00. 60? What? Yep. 60! Don't get too excited we had to replace the seal gasget around the window and that cost us 90.00. Yep. 90.00! So the whole door was more like 150 but it was still a pretty good steal. My first in a long standing naive notion that I can pay what I can afford and still live the high life. I'm never letting go of that.

So my super confident I can do anything hubby and I hung that outside door and then we put in a french door downstairs (to let in the light) and we put in a hollow core door at the top of the stairs. I got the french door at a box store on sale because it was a bit dirty. Yep. I painted it black. Like I care if it's dirty. We re-used the door from downstairs that we took off to put the french door on, FREE!, and we did all the work ourselves.

200 in tools later we were swinging hammers and paint brushes. My husband had the bug by then. He loved installing the doors and he loved casing them. He read some books and hit the wood hard. Turns out he is a bit gifted when it comes to finishing carpentry. He's alllllll about level, plumb and super tight. He will spend hours trying to make it perfect and I will spend hours mocking him and pulling out my 'eyeball level'.

So, he quit his job, looked up some guy in the paper and found a job working as an apprentice for a finishing carpenter. He really loves it. He loves building furniture, he loves working on interesting design and he's super (slow) meticulous about everything he does. It is a perfect fit and he ended up going through all his schooling and such. Just a regular kind of fairy tale where I meet my prince and he transforms into an awesome more super cool prince after I kiss him. NICE.

Since that first project we've started picking up speed. We have built deacons benches, mantles, ledge tables, closets and built-in furniture. Some of these things are way above what the average DIY guy can do. It really hasn't stopped me though. I just get really super itchy just thinking about a project. I want to go go go!! My lovely hubby is the same. He comes home from work and he's all looking around and getting excited for what the reveal picture will end up looking like. SIGH It's LOVE. All a girl with a big imagination needs is a partner in crime with a fininky need to build stuff.

One of the other perks of this particular advantage is that I can salvage job site materials. You would not believe what the average job site just tosses out. Wood, tile, flooring, landscaping materials and insulation. All picked up from the dumpster and turned into useful parts of our renovation. I can't tell you how many times I've had to decline a toilet. No Sir, we already have one sitting in our backyard. No more please! I have a harder time resisting the other random bits that come my way. I made a huge flagstone patio on the side of my front deck (with a pathway and garden sculpture) all out of throw away materials from some stone veneer job. They had to take this rock and shave inches off to make it level and the slabs left over were useless for the job. They couldn't really get enough to make materials happen for another job either. My house is much much smaller and the left-overs were more than enough to make a sexy stone patio. FREE! I love free stuff. I just love it.

Another super perk is the tools. Apparently my husband is a bit of of a tool-o-holic much like he is a raffle maniac. No I mean it. Big macho man, super huge raffle maniac. He would buy tickets in any kind of raffle ever. I'm not kidding. We have lots and lots of tools and he's always up for more. So, in a sense, we have more tools than the average DIY crazy people although I'm sure if you are just getting into this your tool collection will start to grow too.

He has opened my eyes to fun stuff like chalk lines and the Red Bar but he's also got some pretty handy and pretty pricey tools in his collection. Take the laser level. I laughed at him when he came home giddy like a tween who just got a fake txt from her poster boy crush. Sadly the thing has come in really handy. Really really handy. I don't know if it has paid for itself at home but it certainly has at his work. It's cut hours off his work week and that money=time thing is certainly true when you are paid by the job not the time it takes to do it.

So I guess this was all in an effort to maintain full-disclosure. What we do it not magic and there is no team of experts fluffing pillows or pulling all nighters to get the big WOW in the morning photo session. It's just us. Sometimes we sleep in a camping style situation for months while we put everything together on my 'found it on the curb-side' budget and his 'working on the weekends' timeline.

Sometimes I let the kids help with the painting and sometimes we order in because it means we can work for an extra 2 hours. All this to say I know I scored when I landed my hubby and it gives us a distinct advantage to have a live in finishing carpenter. Maybe don't try all of this at home? Or maybe you should just so you know if you will love it or not. We love it.

L O V E it = )

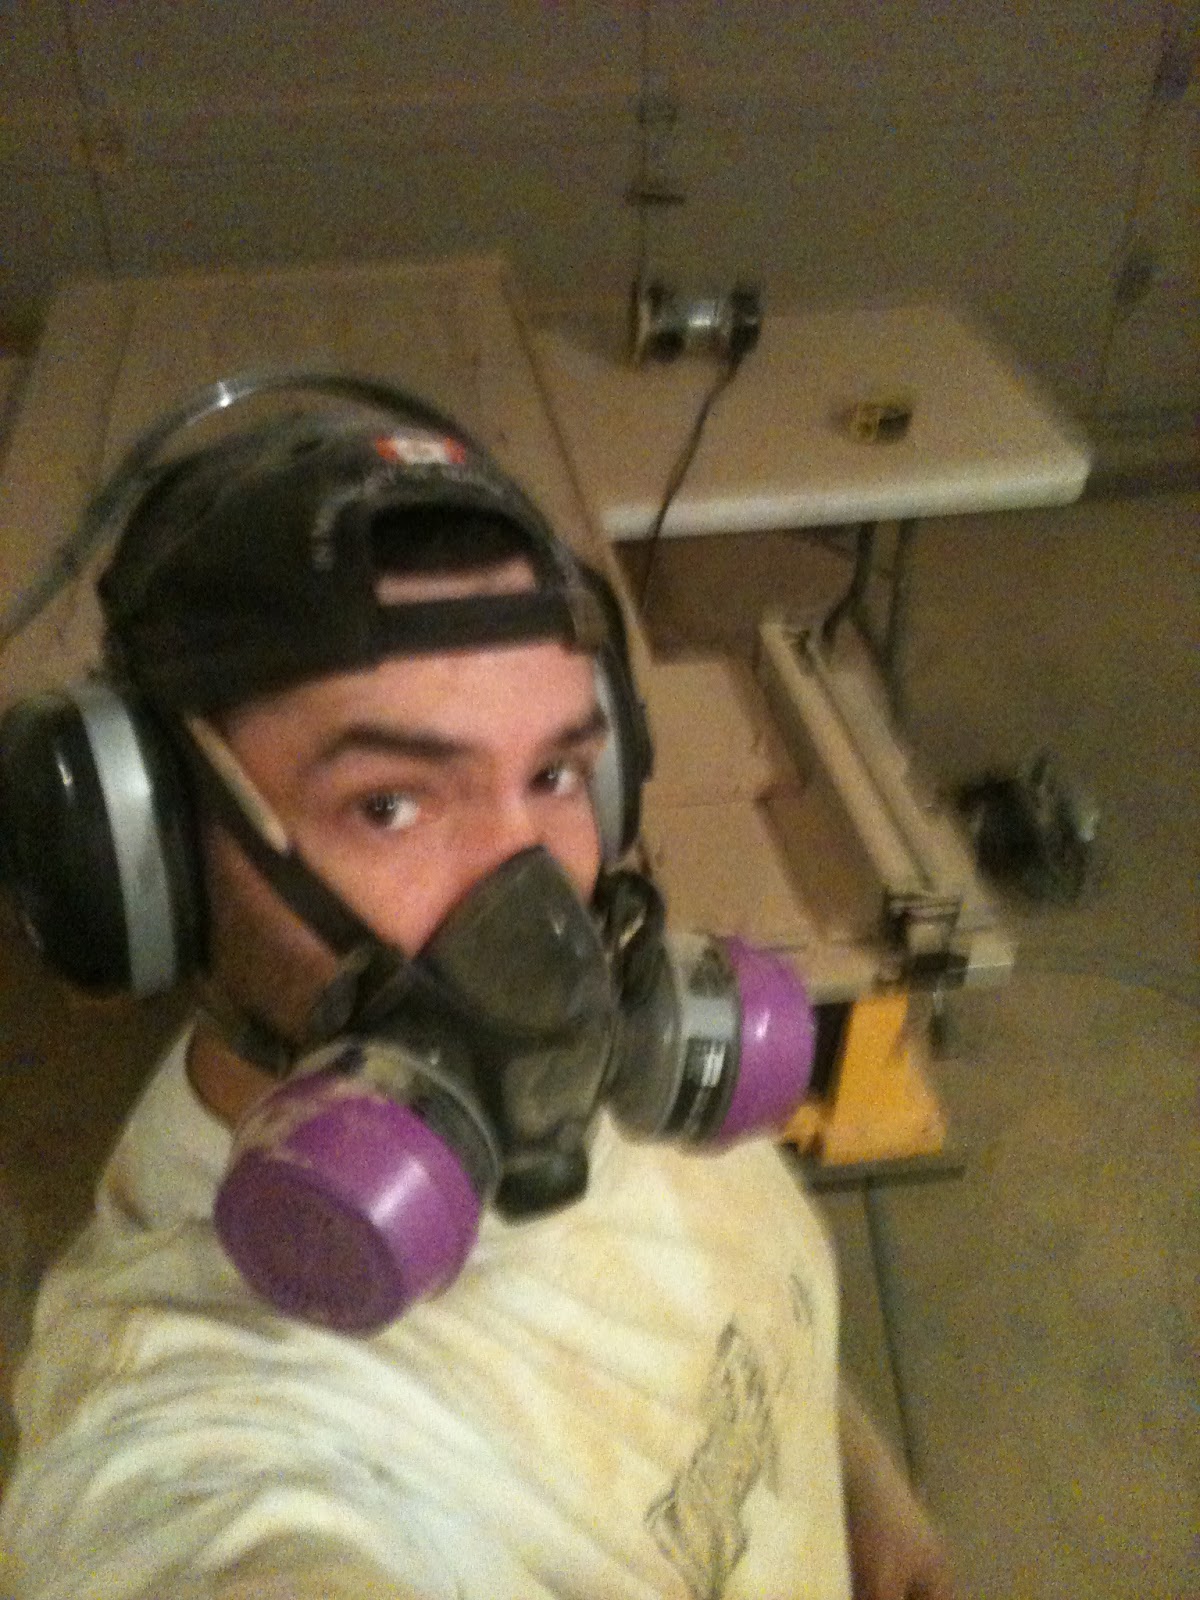
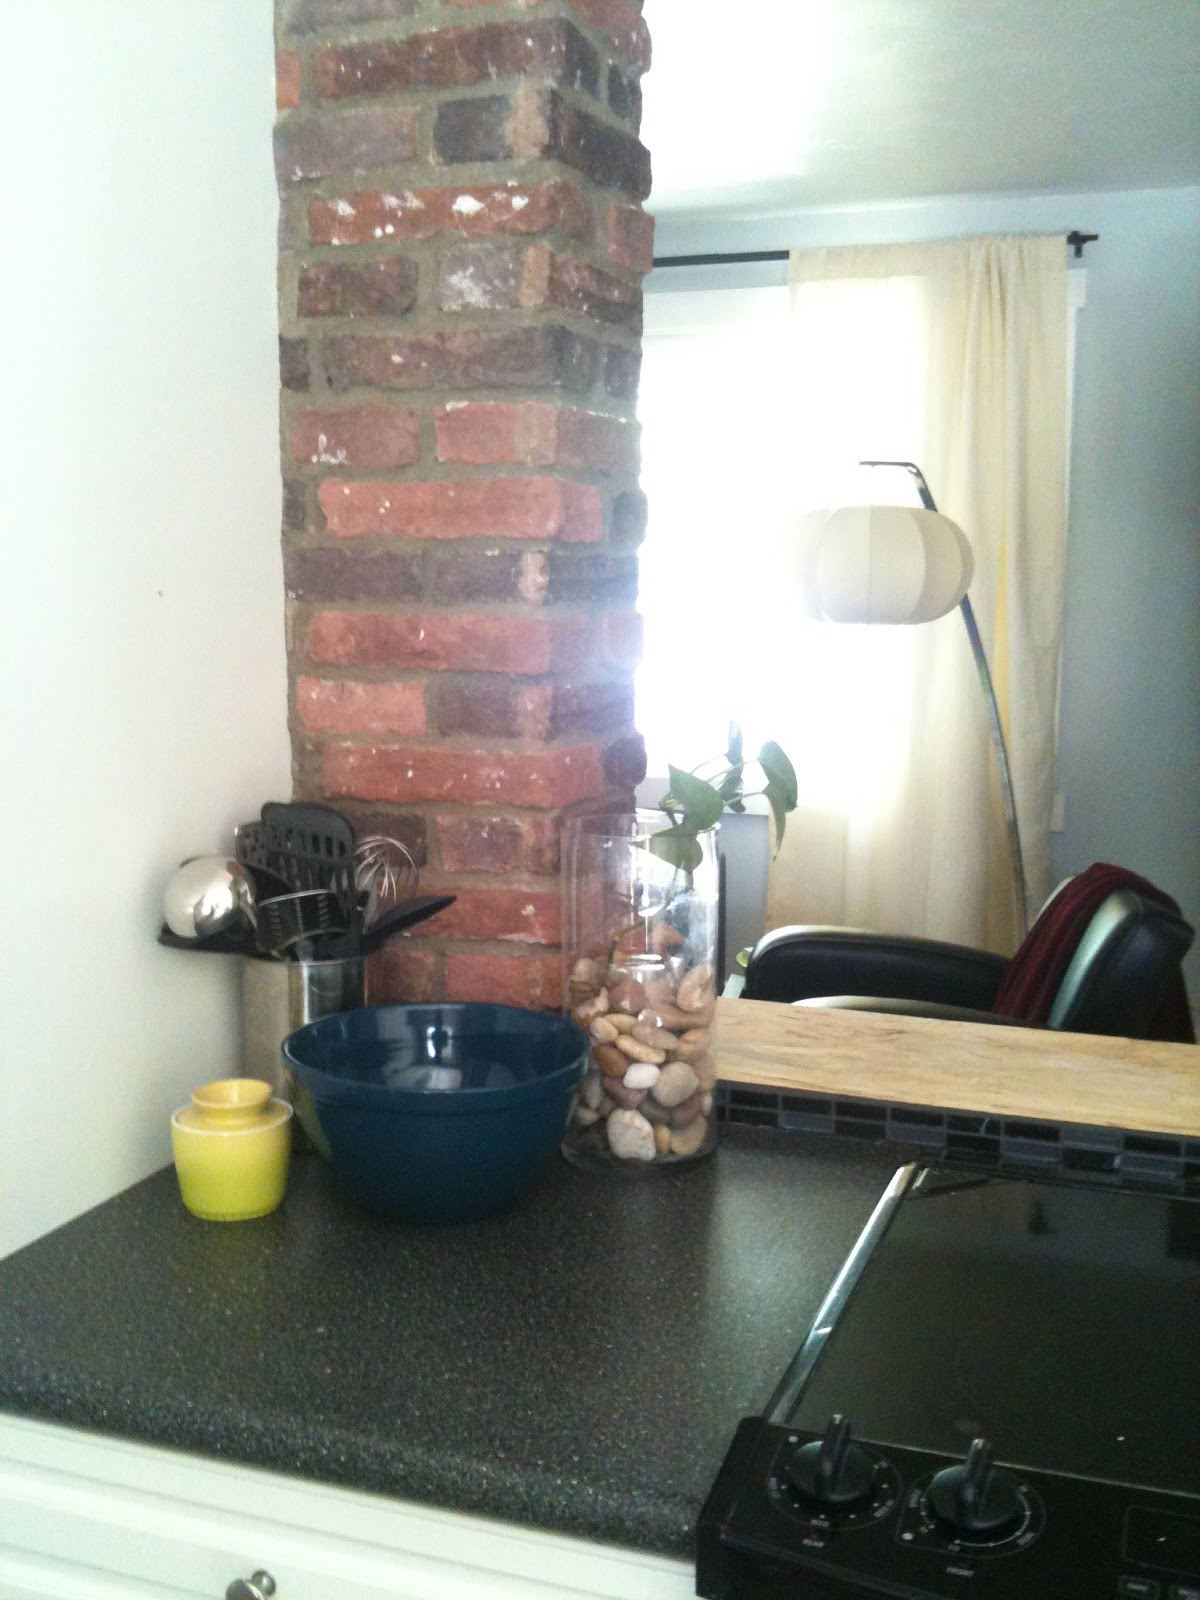
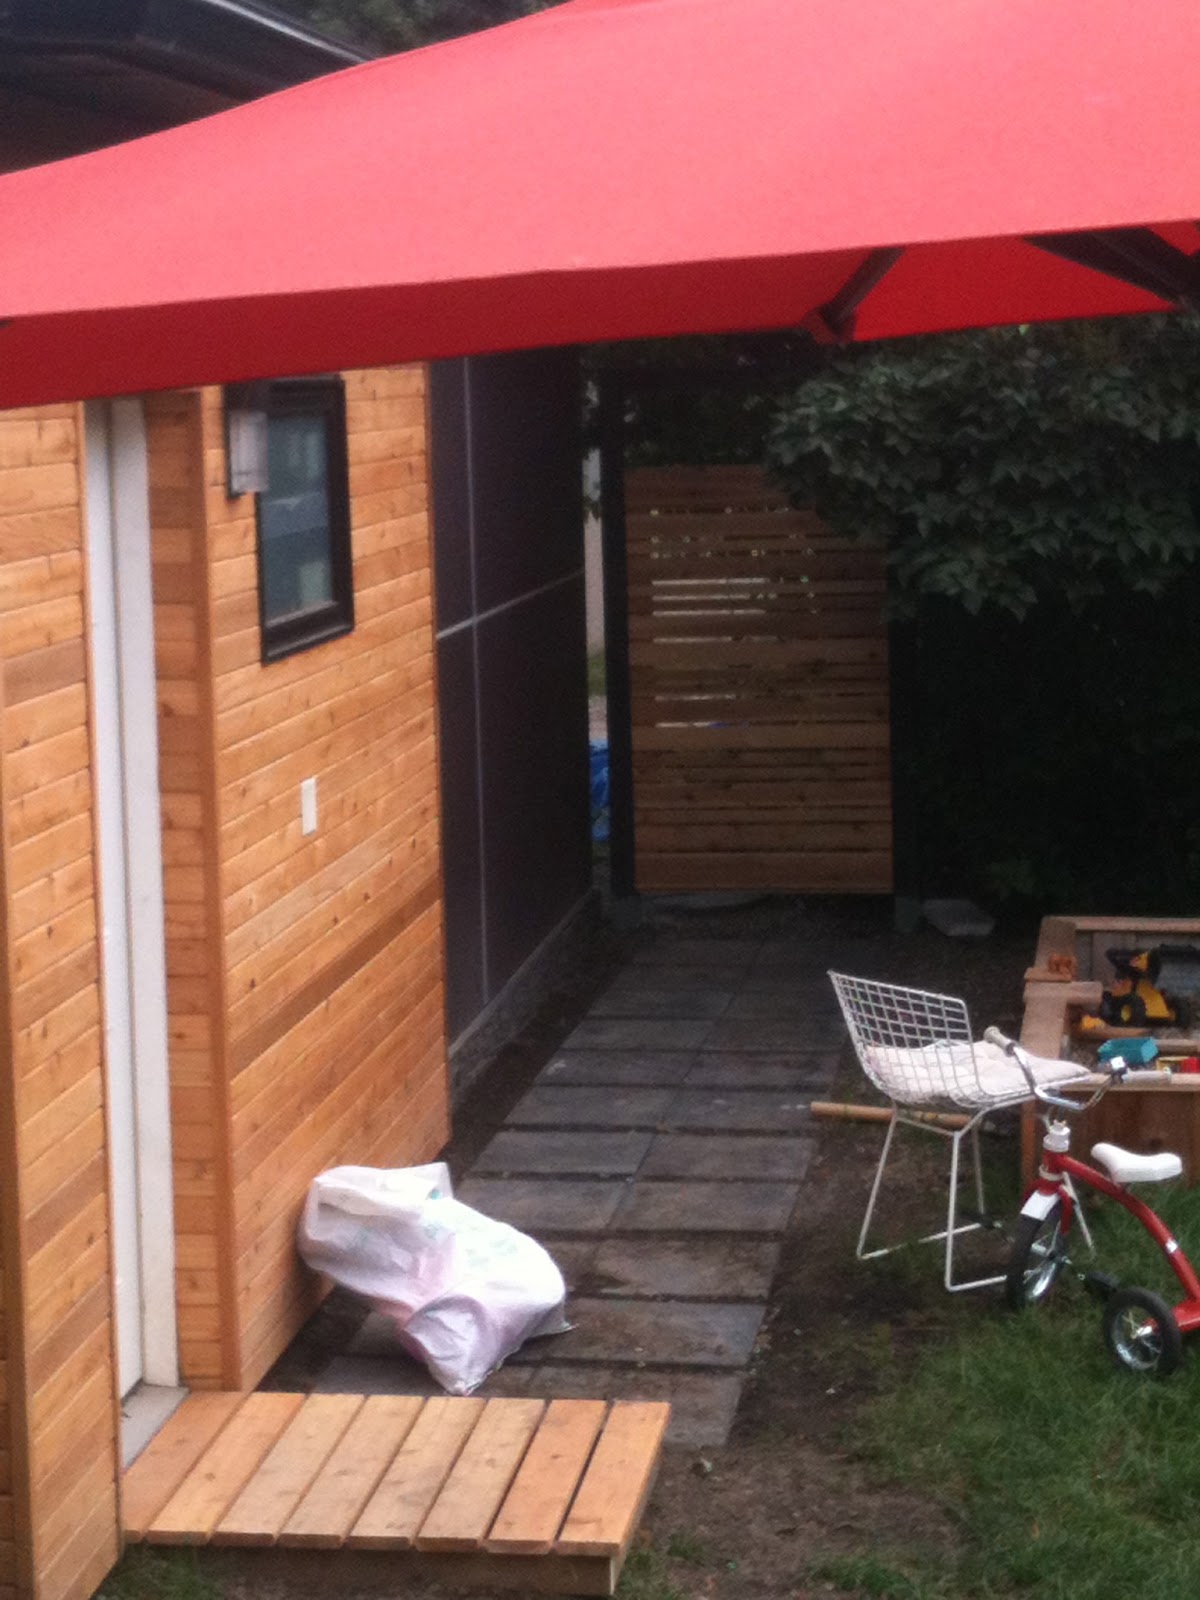
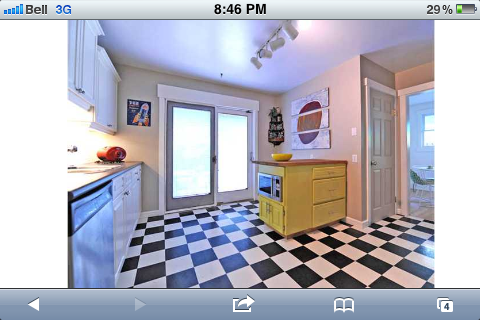
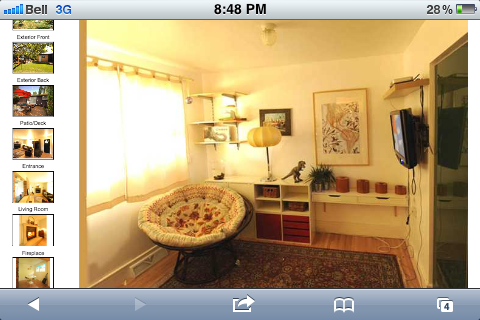
For Fun here is a picture of the hubby at work and some iphone shots of the house combined with some of the realtors shots from the house.
This is finished as far as we planned to take it. Looks pretty good to us especially from the before shots.







Monday, January 21, 2013

Home Renovation: Reno Shows

So today, after feeling a little uninspired, I thought I would check out a little HGTV programming. We don't have TV in the normal sense so when I want to watch something I have to go to the web site and take what they give me. Today it was Sara's House, a canadian renovation show staring a beloved renovation icon Sara Richardson. I am usually a big fan, I still am, but today I tuned in and was constantly slammed in the face with some crazy price tags. It is seriously sane to spend 50,000 on a backyard renovation?!?! It did include a pool but seriously? 50,000??

All this DIY must be going to my head because I think they talked about truly being cheap with the bathroom they put together for something like 8 grand. If I had 8 grand to spend on a room I think I'd keel over from sheer excitement. Heck if I had 8 grand to do each room in my house it would be some kind of scene from a musical. I'd be singing and dancing and hammers would magically float down and bash down walls all by themselves. Ooh Yeah.

It's a little removed from the days where she was putting together rooms back in the day that involved little DIY projects and thrift store finds. I remember those days Sara! I was there. 3300 grand in tile does not a cheap bathroom make Sara! You are getting a little disconnected from the land of the real.

It made me wonder what I was spending on my bathroom renovation.

It also make me wonder if I should have some kind of plan.

I think she really made this clear in one of the episodes where she struck gold with a fabric that was 1.99 a yard. If you are designing on the cheap you really need to let the cheap dictate what you do.

I'm paraphrasing to the point that it might not even be close to what she was saying. Heck let's just leave her out of it and say that it's what I'm saying.

If you want to decorate on the cheap you have to be wide open, if you want to renovate on the cheap you have to absolutely go in with no expectations. Not stupid. Not blind. I just mean you need to let the materials that you get on the cheap dictate the design/style/direction. You have to work harder for the push that you want.

Now I'm not saying you can't make some choices but you have to be prepared to let go of the marble vanity you saw in the Urban Barn store window. It's 2 grand and it is not happening!  Your budget is 2 grand. Yes Sara, you heard me! I think I may even have to take out an instalment on that 2 grand. That's real! That's the kind of budget I'm talking about.

8 grand to do a bathroom. Good Gravy.

Ok so here is my budget breakdown (again) on my last bathroom reno.

Tile Total (floor/shower/backsplash): 400.00
Heated Floors: 600.00
Bathtub: 75.00
Plumbing(Fixtures cause we DIY): 150.00
Vanity and Sink: 300.00
Medicine Cabinet: 100.00
Mirror: 15.00
Lighting: 30.00
Shower Curtain Rod: 10.00
Toilet Paper Holder: 10.00
Limestone Sils for the Window and Cubby Ledge: FREE
Grout/Silicone: 30.00
Drywall Taping/Mudding: 100.00
Baseboard: FREE (reclaimed)
Casing: 15.00 (milled from whole sheet of MDF so this might be less)

So that lands us quite near the 2000 mark and I was over budget!

DIY labour
Demo (entire bathroom)
Insulation
Plumbing (toilet, bathroom faucets, vanity)
Electrical (light, in-floor heating)
Tiling (all)
Painting
Tub Install
Vanity/Sink install
Mirror Install
Medicine Cabinet install
Cut re-hang door.
Hanging Drywall
Floor (subfloor, levelling compound + heating coils, thin set, tile, grout)
Floor Transition

So I know that the job can be done for under 8 grand you just have to work your but off. I think it can be done for even less than what I did but I wouldn't recommend the gut-job approach if you are looking at coming in under 2 grand.  

So what is up with this new bathroom? Well I have a few to do this time around. This is a nice thing for me because it means that it won't have to do without a bathroom for weeks on end. It is going to make budget a big concern though.

I will start with what we have already spent.

Tile: 300.00
Tub: 500.00
Plumbing: 150.00
Shower Curtain Rod: 10.00

DIY/Labour
Window Casing: FREE (reclaimed beech)

Still left to do:
Floor Tile:
In-floor Heating:
Vanity:
Sink:
Move the Plumbing for the Toilet:
Pocket Door: Undecided
Towel Holder/Hooks:
Lighting:
Paint:


So were I to stay roughly in the same budget for these items I think we would be looking at a slightly larger budget over-all. Maybe 2500?

I think I can use some left-over tile from our last tiling job for the floor and I might be able to score a good deal on the vanity but I think most of the other options are getting pretty darn close to absolute bottom of the barrel. I ended up not being able to shop around and got stuck buying tile and a tub at regular price but I still think I made the right choice there. Sometimes you just gotta do it to get by.

Now this is the dangerous part because I want to put down black and white hexagon tiles for the floor but that is not the cheap version of this project. The cheap version has me picking out tiles from the piles stacked in the garage and working with what I have on hand.

I wonder if I truly am crazy trying to renovate a bathroom (or any room for that matter) for under a couple thousand. I mean if this 8000 "cheap" bathroom is the standard no wonder people think I'm loopy for trying to take it on. They think I'm spending 8000 on a bathroom?? I'm slowly waking up here, I'm realizing why people stare at me like I've lost it. I am blinded by the DIY idea (and really I can do it myself so why would I start hiring right?). I am crazy like a fox!

This whole cheap bathroom being 8000 is not the crazy part. The crazy part is that she spent 10 grand in the laundry room.

oi!


Sunday, January 20, 2013

DIY: Cool Tools

When it comes to the DIY tutorial page it seems like there is always a list of tools needed to complete the job. Sometimes I notice that these "Free" DIY projects or "Low Cost" room make-overs actually involve a couple thousand in tool requirements. Sure, a gallon of paint costs under 50 bones but you are also looking at paint rollers, razors (for scraping windows) sanding paper, sanding blocks, filler (I like my DAP), tape, screw drivers, drills, cleaning supplies and a whole host of other little items that can impact your budget. Especially if you buy into a gimmick like the ladder handy paint buckets or the no-drip extension handles. I used to use plastic but now I have a good canvas drop cloth. It was 50 bucks alone! So let's talk about it, let's just put it out there. You need more than just a bucket of paint to transform a room. Some of these tools are stuff you will have on hand already but there are lots of things you will need to run out and buy. How do you really know what you need though? How can you justify spending 300 bucks on a saw for this one time project? Do you really need all these tools?
Can I use the plastic doohicky or do I need the metal one that costs 10x as much. I think the big reason that a lot of these tutorials fail to mention the cost of tools is because they are on-hand (and really a 500 bathroom make-over takes a real hit when you include 200 in painting supplies you already had in the garage right?). I know we have a huge room filled with stuff we either use all the time or bought for that one project and never touched it again. So I'd like to take the time to give some cool tools the props they deserve and shed some light on when/where they come in handy. Let's call this a behind the scenes look into the DIY universe.

Dont' get me wrong, a lot of real cool DIY projects can be done with minimal tools and others can be done at a minimal cost by renting or borrowing some tools. Eventually though, when you get super serious about this whole adventure known as DIY, you start to really desire the tools. You start looking at the drill and think about trading up for a lithium battery or a right angle multi-tool. You start understanding a bit of the terminology, like mitre saw vs table saw vs compound mitre saw vs skill saw. After a while you need to start building up your arsenal of tools and you need a place to put them. You start to gather an inventory that ends up being used over and over again and it can make things a lot cheaper when you have your own tools ready to go for whatever job you need to do. We are constantly picking up tools (still!) and we've been at this for years. You'd be surprised. 

For example I have a dresser in my entry way that is full of tools that I have randomly picked up from around the house and put away. It is a hodgepodge of hand tools, random hinges and scews. Lots and lots of screws. I pick them up from all sorts of places and put them in the dresser so we always know where to go to look for that tool you were using to hang the light in the bathroom, or a measuring tape. Always go to the dresser when you need a measuring tape there are probably 4-5 in there at any given time. 

It might be helpful to bring some focus on the tools that are really helpful. The ones that always end up in the dresser because they are always in play somewhere.

I want to talk about some of the really and truly cool tools that I've come to depend on. 

First up will be the Red Bar. 


This my dear sweet friends is one of those tools thats costs about 10 dollars and can not be replaced. We use if for demo, painting, finicky buisiness of all sorts and random jobs. As you can see from the pictutures the tool is double sided. There is a keyhole shape on one end and a thin wedge shape on the opposite end. One 1/2 of the bar is coloured red, hence the name Red Bar. We now have 2 and still manage to lose them constantly because we use them all the time. 


Here is a pictorial of my current good time. Picking 35 year old staples out of equally old subfloor. Some with rusty hues of water damage and others with bits of disgusting carpet underlay still attached. 

Enter the red bar, useful for getting under things that are tight to other things and bending them up. In this case if the staple is loose she will fly right out (eye protection people, no seriously you are going to need it). 

In other cases you are doing the scrape. You take the strong arm of the red bar and pull or push (I prefer pull) along a surface to find sticker uppers and to loosen jammed up nails or staples. This comes in handy if you can't see what you are trying to pull up or if what you are trying to pull up becomes bent over. It's also great for getting off medium loose gross carpet underlay so you don't have to touch it. 


Then comes the wedge/pry function. Wrecking bars are a big step up from these little guys and traditionally used for demo and other big jobs. However! We do a lot of pulling-off-the-old-70s-trim work and this little baby gets in quick and gives us just the right amount of leverage. It's light, it gets in there and it's a lot harder to wreck things you don't really want to wreck (like the jam). 


All this and more! There is more! The little keyhole thing is designed for pulling nails, staples, wires and whatever else you might get in there. The shape of the bar means it can get into a lot of places a claw hammer can not go. It also means you can pull nails without gauging the whatever it is you are pulling nails out of. I suppose you could if you tried but it is a lot harder to do some serious damage. This is a carpet nail on the floor in the corner. Yoink! No sweat. 


Oh more trim pulling! This time it's the strong arm side of the red bar going to work in the tight corner of some of that old-70s-trim we seem to find everywhere we go. This is perfect for a little leverage in tight corners. A hammer is not the tool for this job. Actually this is not the way to pull it either. The goal here is to pull it just enough to get the wedge in on the other side. You don't want to be repairing a drywall anything, nevermind a corner. 


Last shot for today is a random thing on a wall that needs scraping off. You can also use this fine wedge end for putting putty into small holes, scraping goop off of hard surfaces (it will scratch wood if you are not careful). 


Other uses include opening a paint can, closing a paint can, smashing on something that needs to be bent over a little, shimming something while you are shimming something else and a good number of various whatevers that will come your way during every DIY project ever. 

My husband, who is a journeyman carpenter and all around tool junkie, has passed this little gem on to me and I am now passing it on to you. 

Get this tool. This tool is a cool tool. 


Saturday, January 19, 2013

Door (or Window) #2 Please Bob


Oooooooh. The crowd moans in unison as the door (window) opens to reveal a big FAIL! No grande prize for you contestant #1, move along!

So one of the things you encounter over and over again in a "fixer-upper" is the surprise WTF happened here. It usually starts with a small clue that something is not right but it can also be a pretty obvious sign of damage. In this case we could see some water damage under the old carpet. The subfloor was pretty stained with urine and other fun things so it was near impossible to tell if there was water coming in from the window. 

IF there was water coming in from the window and we decided to lay down the new floor without fixing it we would be basically asking to have our new floor ruined in the spring. 

If the window framing was solid and the staining was just due to whatever the other staining was due to then we would be able to assume that the window was sealed properly.

We needed more information! We examined the window framing and noticed that there did appear to be fading due to water damage. Nothing conclusive but we now had enough 'doubt' in the reliability of the window to pull off the drywall. This is best avoided because once you pull it off you will need to put it back on. That's hours of sanding, mudding, taping and other messy work you don't want to jump into lightly. We jumped. It is always better to know for sure. This is what we found. 


To break it down, it appears as though there is a good amount of water damage. Some very old discolouration that could be mould but is most likely just staining from the rotting wood. It Also looks like we have some insect damage. All of the supporting framework for the window, the insulation and the window itself will need to be replaced. Better luck next time contestant #1. The prize you selected is an unplanned inside/outside build job with thousands of dollars in materials.


Now as much as we grabbed a beer, sighed and stared at this particular problem child for a good long time, this kind of thing is to be expected. A lot of a houses problems can't be seen with the naked eye and a lot of them can't be fixed with a coat of BM decorator white.  I wish! Sometimes you get lucky. Sometimes it looks a lot worse than it is. 

When we pulled the tile off the old bathtubs we always cross our fingers and hope for clean framing. No Black Mould! We scream in our hearts a hopeful mantra and then fearfully look behind the drywall. So far so good! No black mould! Even though the tiles an grout are often grossly covered with patches of black we have gotten away with minimal clean up. 

Not so in this case but it really is pretty rare to start ripping things apart and not find some kind of WTF behind the walls. This is the main reason you want to be really careful about the ripping and tearing of walls and plumbing. We gave it a good once over and decided it would be a job for the spring. We are going to cover it up for now, only temporarily until we can shop around for a cheap window. Maybe we can even get the deck that will run under the window up first to give us a little boost. 

It's going to be a lot of work and a big job. Surprise! This is why you always have a case of beer in the fridge when you are doing your own demo. 1 to feed friends who pop over to help and 2 to take the edge off surprises like this one. 


Thursday, January 17, 2013

New House: Sunset Over Trees

So we've got a lot going on right now and it feels like a good time to stop and remember why we made the big move to begin with. I remember the trip because we were all sick to some degree, our son has some special requirements and when he is sick it's best not to expose him to lots of people. We had to get out of the house, we had to go somewhere.

I had been looking at this house online and trying to convince my hubby that it was worth a look. We like cheap, ugly and potential in our house candidates. This one was amazing, so ugly! It was also huge. Really huge! Even for the neighbourhood it was in it had exceptional square footage. One of the previous owners had decided to add on an extra suite and the square footage was ridiculous because of that. When we arrived we fell in love. Not so much with the house. It had good potential but a house can be changed around, my advice is to look at the stuff you can't change first. Location, size, community, accessibility and neighbours. This house was off our radar mostly because it was not in the city, it was about 25 minutes out of the city limits. My hubby wasn't sold on the idea of living in a small town, there were issues about the leasehold land and he grumbled a bit about why it was on the market for so long. He had seen the pictures online and when he looked at them, he saw work work work. Lots of work.

So on this particular Sunday we decided to go for a drive. Take the kids out, open the windows and get some fresh air. We decided to check out the house and the community just to see, just for something to do. On the way out I called the listing agent who just happened to live in the community and he just happened to be available. Nice! We could see inside.

The community was amazing. As soon as we drove in we realized it was something special. There was a fire station with charm, a little community centre, soccer fields and everywhere I looked there were families. Families walking, biking, running and playing. The whole place was a settled into a forrest of giant pine trees. It was like a campground with really big expensive tents. I fell in love with the idea of living in a forrest. It was just then, in the afternoon sun that a family of deer walked out on the road and wandered into the trees across the street. Arrow straight into the heart of me. TWANG! I saw my kids enjoying the nature, I saw a community of families and I saw a really lovely place to spend my down-time.

My husband was blown away. He couldn't really speak except to say "this could work hey?" over and over again. The resulting house tour, inspections and such turned up nothing that scared us too bad. He fell in love with the garage and the basement because of woodshop potential, he fell in love with the community, he absolutely saw the haven from the city that I had wondered about. We saw all kinds of potential for a home business. The massive amounts of work were obvious to us but the truth is, when you are looking to rip it all apart anyway, you want to have something as gross as possible. There is no sense in paying good money for something that is in OK shape when you want to get rid of it no matter what. There are some things, like in this house for example, that need to be a certain standard. The structure needs to be sound, the mechanics need to be working and the place needed to be livable. This house was smelly, neglected, dirty and in need of some updating but after replacing the gross tub I think it would be safe to say we could live here for a while.

We ditched our 1100 sq foot city home in favour of this 2700 sq foot country home. There is a forrest that surounds us and a river just behind the house, not 5 minutes from our back door. My son met a young boy not 4 houses down from us and they bonded instantly. They adore each other and we now have weekly playdates (at the old house there were no kids that we could play with in our neighbourhood). When I go for a walk I am greeted by the soothing trees and sky, not cars, and the views are amazing. I can see sunsets, stars and the air is unmistakably fresh. I'm chomping at the bit to get started on the work, the transformations and the nesting. I'm excited to make this new house a home.

Wednesday, January 16, 2013

Summer Vacation: Pondering the Plan


So it happens that for a number of reasons we are stuck where we are. We can't really move away and we are the kind of family that probably would have moved away if we could. We would go to the coast and be our water loving hippy dippy selves. 

As is it, we have to stay here in a more conservative waterless climate. So in the summer we like to head to the beach. Here are some shots of our holiday to Vancouver island last summer. We spent 2 weeks with our little 'boler knock-off' trailer driving through the interior of B.C and then stopping on the Island for a full week of beach life. 

Here is my son checking out the view from a rocky ocean beach by Nanamio, BC 

Here is the sunset view from our beachfront campsite in Nanamio. 

This is Harrison Hotsprings, B.C. We stopped here on the way home. Awesome little hidden gem. 

This year as it turns out we probably won't have a lot of money for a big vacation. I'm crossing my fingers that everything will work out for the best but it looks like money is going to be tight. It also looks like I might be going to school in Victoria so at some point during the spring or fall I will be heading there for a little on-campus conference type thing. Depending on when everything goes down it wouldn't make a lot of sense to holiday in the summer and then go back for a couple of weeks for school.  

I'm determined to have a great summer and I feel like it's super important to travel, especially with my family. I like taking them places, I like who we are together when we road trip and I especially love our combined sense of adventure. We are definitely the kind of people who say "I don't know what this is, let's go check it out!" We make random stops on the highway and we go where other people might say "We should stop there, next time.". I have to say we suck at the planned organized holiday, but the spontaneous and organic adventure we seem to completely rock at. 

As I was leaving the grocery store the other day my eye hit that magazine rack at the exit full of free publications. Campus papers, flyers, real estate junk and tourist information. My eyes stuck on this big thick book called "The Daytrip Adventure Guide". Apparently listed within these tissue paper thin pages are all of the local festivals, art round-ups, parades, rodeos and events that happen annually all over the county that we now call home. There are famers markets, celebrations and music events and I bet they are a damn site cheaper than something similar in one of the big centres. 

The adventure part really caught my eye. Part of me suddenly wondered if I could get organized and really commit, we could quite possibly arrange our summer full of long weekends spent exploring our new surroundings.

The advantages would be no long days of travel, less gas burned, a sense of community, connecting to our new surroundings and just supporting our local stuff. I like all these perks of the plan. 

Hmmmmmmm I say. I wonder I wonder. Could I get the kids involved in picking out the more interesting events. Would this be good for our growth? I am starting to really wonder if this might be the thing to do. I need cheap. I need fun. I need a summer to look forward to. I'll keep you posted.

More vacation shots! Random is our specialty 


Wednesday, January 9, 2013

Laminate or Hardwood?

Refinish vs Paint?

Re-Use vs Rip Out?

I think I've wrestled with these questions many times over the course of the last few years but it never really gets clear. I have no idea which is better or which is right. 

We went with laminate in the new house because we needed to cover a lot of square feet with a cleanable floor ASAP. It needed to be something that would endure us. Endure our renovations, our dog, our cat, our kids and whatever else walked through that door. It couldn't be too precious, not in this house. 

Still, I wasn't sure about the laminate. It made sense but it is just not the same, you know? It feels too slippery and it's cold. It looks fake and I'm the kind of person who really cares about that sort of thing so I knew it would bother me. 

In the former house we opted to refinish the hardwood about 2 months before we put the place on the market. For 6 years I lived with old ratty worn-out floors that always looked dirty and were just plain old ugly. 

Within about a week of having the floors all shiny and nice again I started noticing the wear. It was not bad, but it was happening and there was nothing I could do to stop it. We felt panic when the kids threw a toy. We held our breath when some one walked across the floor in shoes. It stressed us out! The dog? Yeah the dog was a walking click-clack of stress. I loved the way they looked, the way the felt and the way they warmed up the house but I did not like the stress. 


When we had them refinished we considered doing it ourself but decided ultimately to get a professional to do it. Part of the thing is taking the time to sand everything evenly and we just didn't have that kind of time. We had a deadline. 


Here are some before and after shots of the floor as it is being sanded and then varnished. This is an old Oak floor that was completely wore out and grey so it really looks amazing. I'm really a fan of the pre-varnish floor but it still looks nice after it's all done.

The end result was a warm floor that was comfortable to walk on and easy to clean after the varnish had cured. It was easy to scratch the surface and the process cost us about 2000 or 2.00 a square foot + we had to live elsewhere. We were lucky because we have a fully developed basement with a kitchen in this house so we ended up being fine, however that would have cost a lot of money otherwise.

Our laminate floor on the other hand was a DIY project that cost us 1.65 in floor and .40 for the underlay. So almost 2.00 a square foot. It was done within minutes of laying it down and so far has not a scratch.


The floor itself isn't that fun to walk on. I find it too slippery and I find the little bevel edges sharp on my barefeet. It's not painful I just notice them. I might on a hardwood floor too. I also find it cold underfoot. That might be nice in summer time! 

The kids are not able to damage the floor at all so far and the dog has had 0 impact. There is something nice about not having to worry about that. I do worry about water though. 

I'm not sure you can ever get everything you need but if I had it to do over again, and more money to do it with. I would use real wood with a worn out finish that would patina with my children's love. Maybe next time?