Tuesday, January 8, 2013

Today is Tuesday. 

It's one of those Tuesdays that feels like Monday. SIGH. I'm going to be messed up all week. 

So I thought I would share with you a little of what we have gotten ourselves into lately. 

Some really before shots of course because most of the progress we have made is behind the scenes so far. 

I think this is one of those things that is really overlooked in the whole before/after magic of the DIY universe. 

The real in the reality. You know that dresser that got all painted and looks spiffy for the camera. Does it still open and close the same with the paint on it? Is that house with the beautiful palette kitchen island. Is that island wobbly? Is it safe enough for kids to crawl on it?

These are the things that sometimes get lost in the fantasy of spending 500.00 and getting a brand new bathroom 'look'. 

One of the first things we tackled was the flooring. 

Here are some shots of the floor as it was when we bought the house and during the process of getting it functional. 


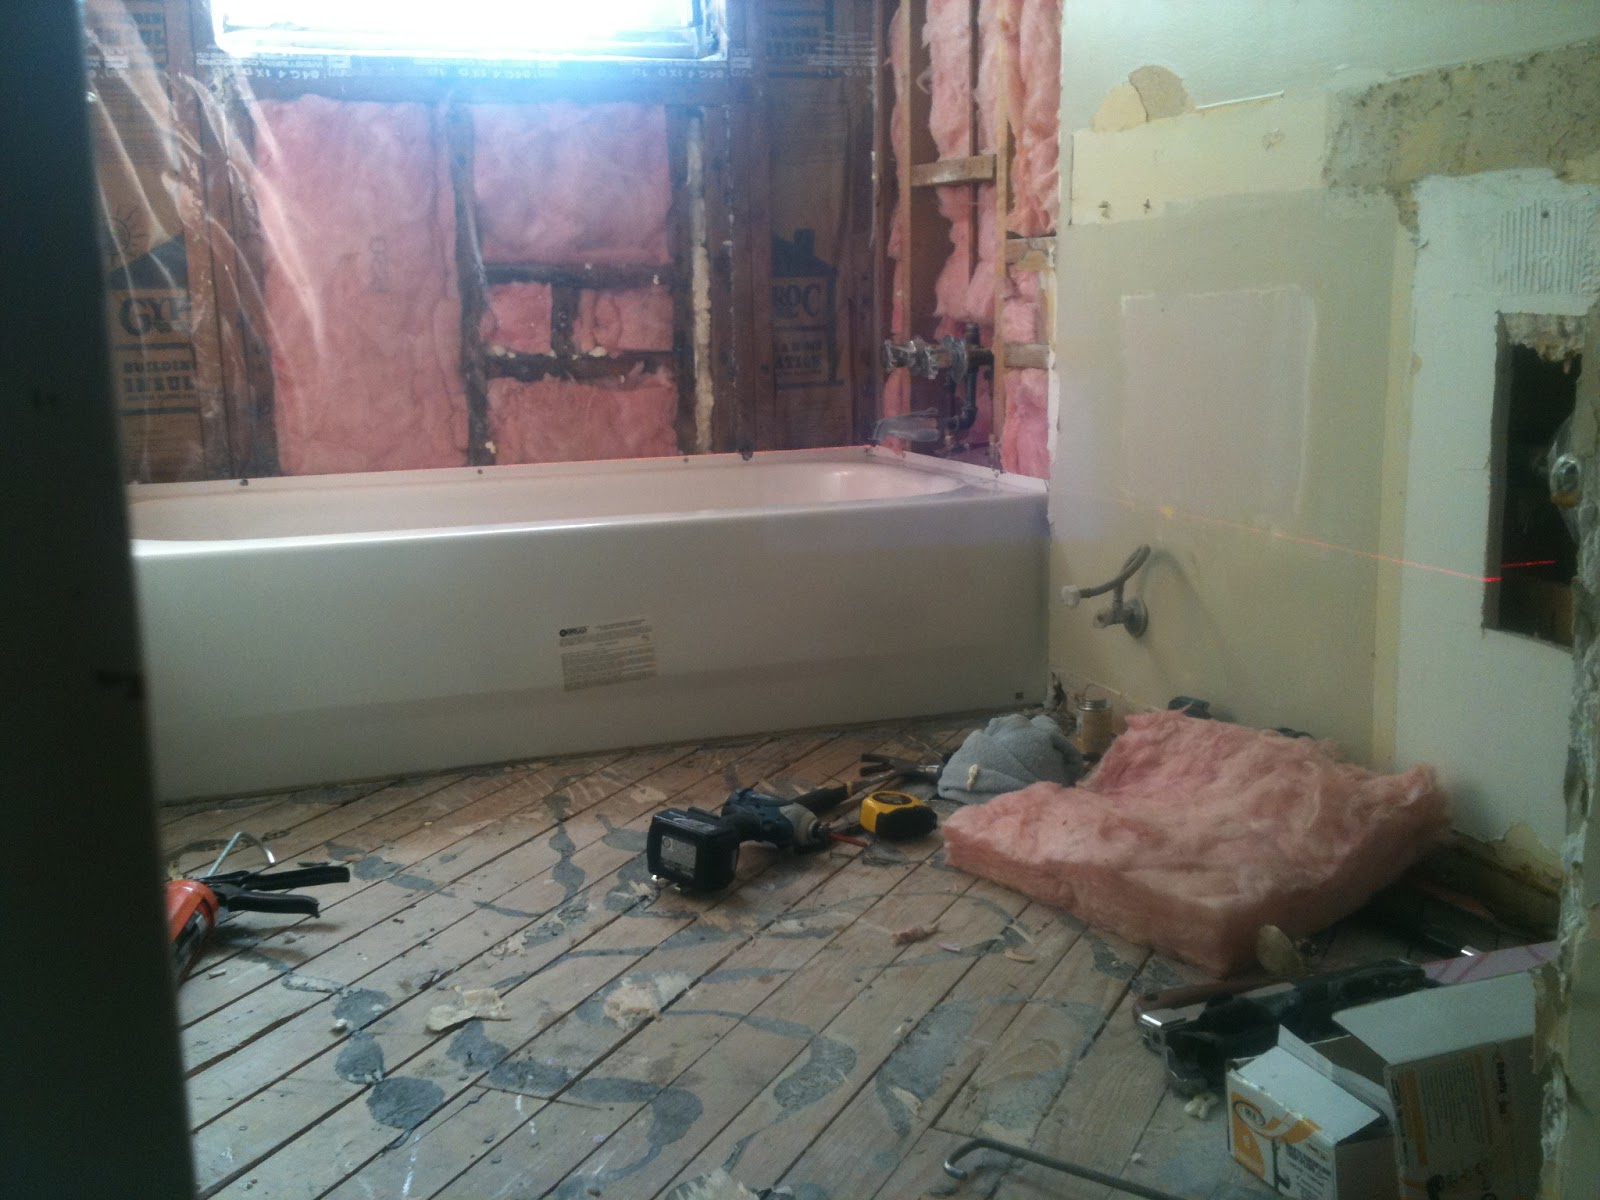
So this is a live chaos progress shot of the floor already having been removed to expose the subfloor in the hallway. That door belongs to the bathroom. I don't know why the guitar and the painting are there, I'm assuming we were ripping up carpet elsewhere and trying to get some space. 
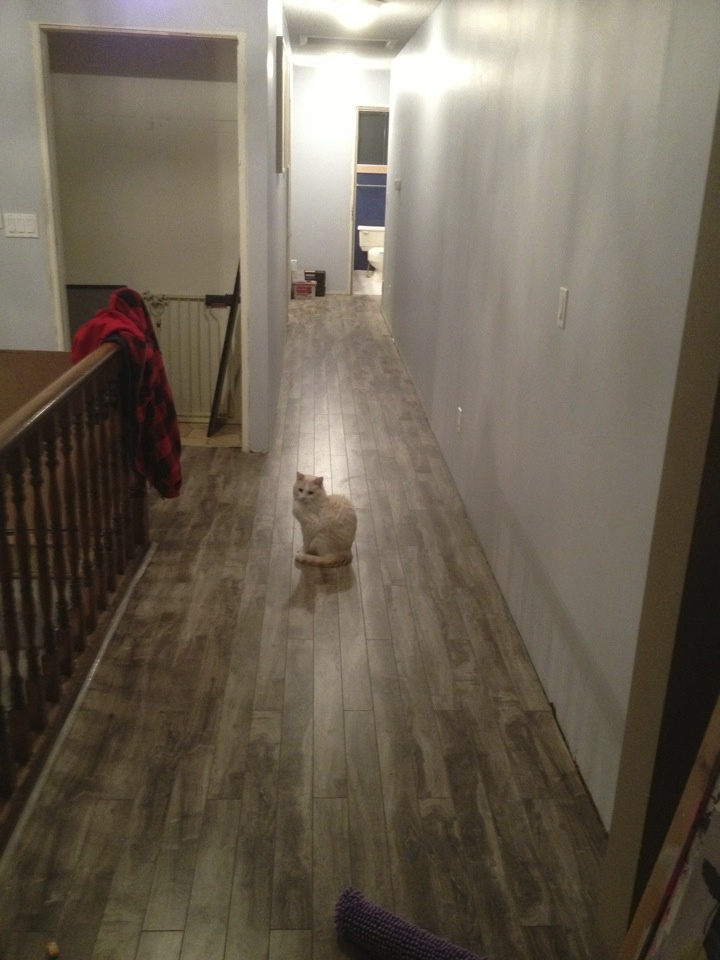

After! The flooring we chose is a silver maple laminate. Not my first choice but with kids and animals it's hard to really say yes to anything else (in my price range). 

Now as BAM as this is, there was a lot of stuff that went into the whole process. Craig went around the whole hall bent over like an old guy with a walker trying to fix all the squeaks. He put more screws into the joists where he found them. We spent about 3 hours pulling up staples from the old carpet underlay and we also had to level out a section of the floor next to the closet door opening that had a serious sag to it. All of these things were time consuming and not so much in our pan for the attack. 
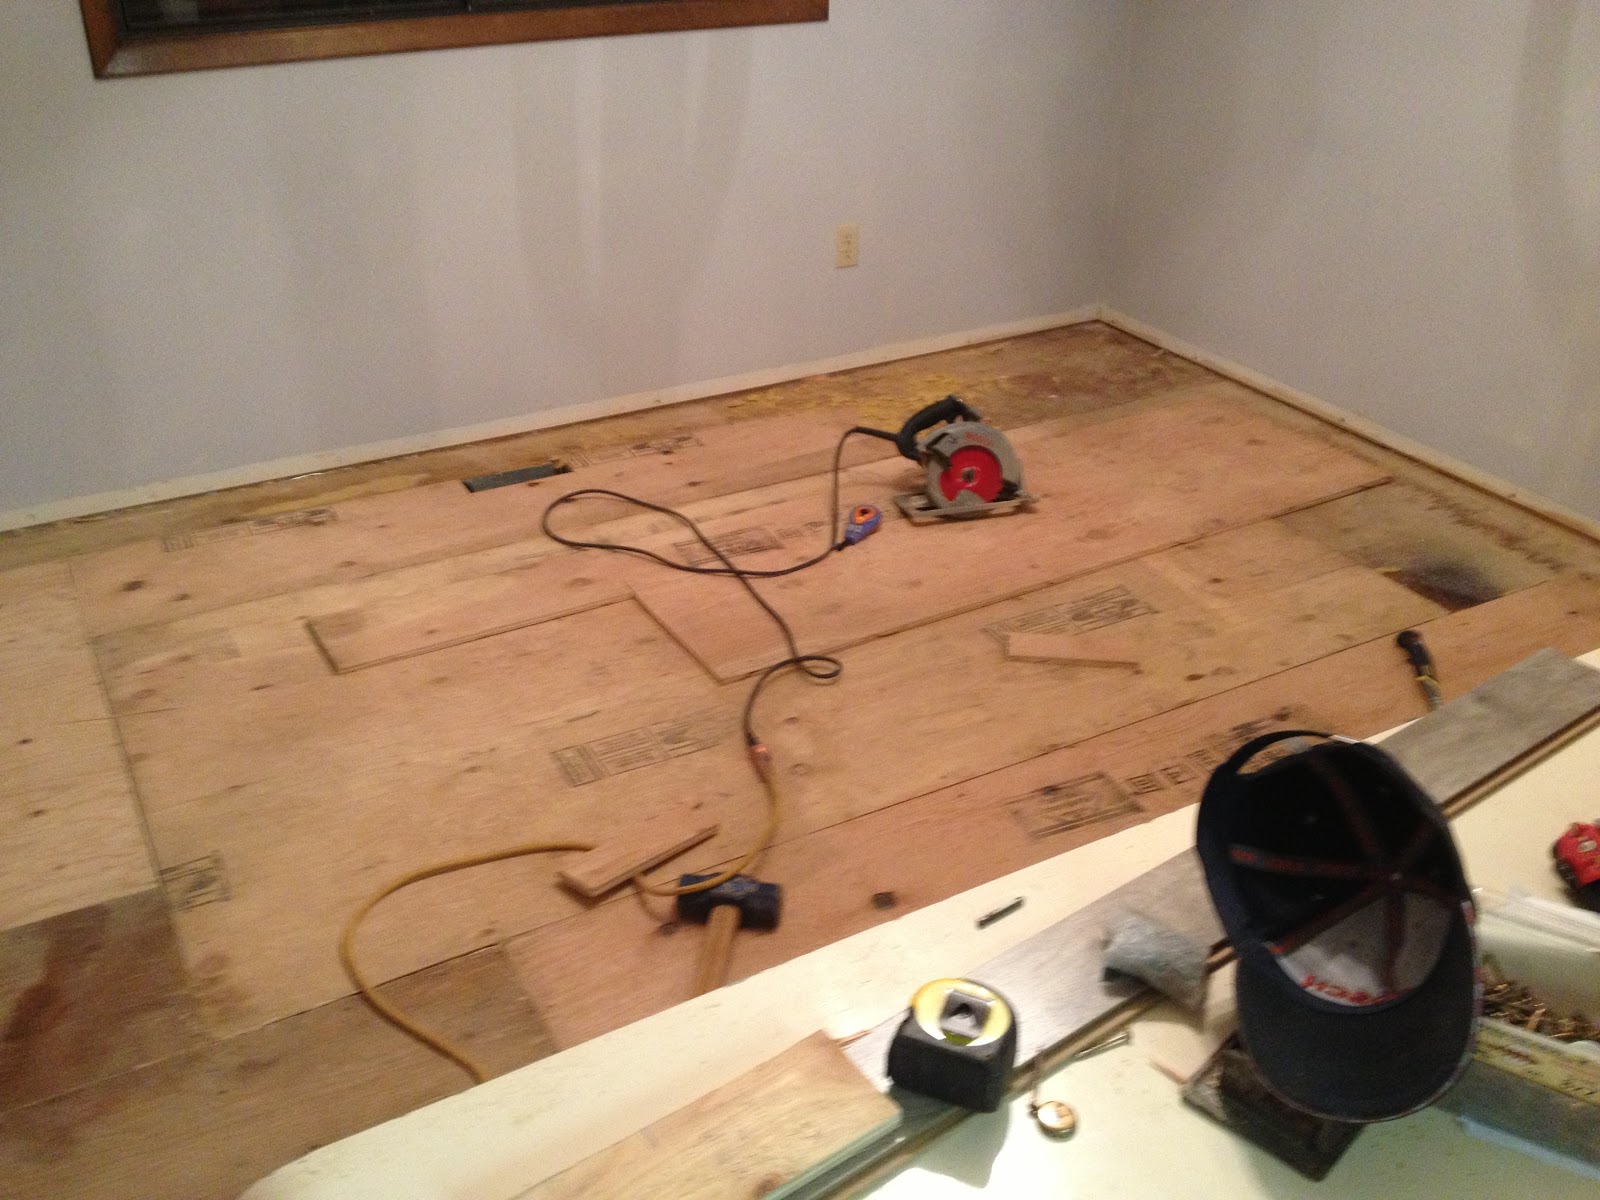

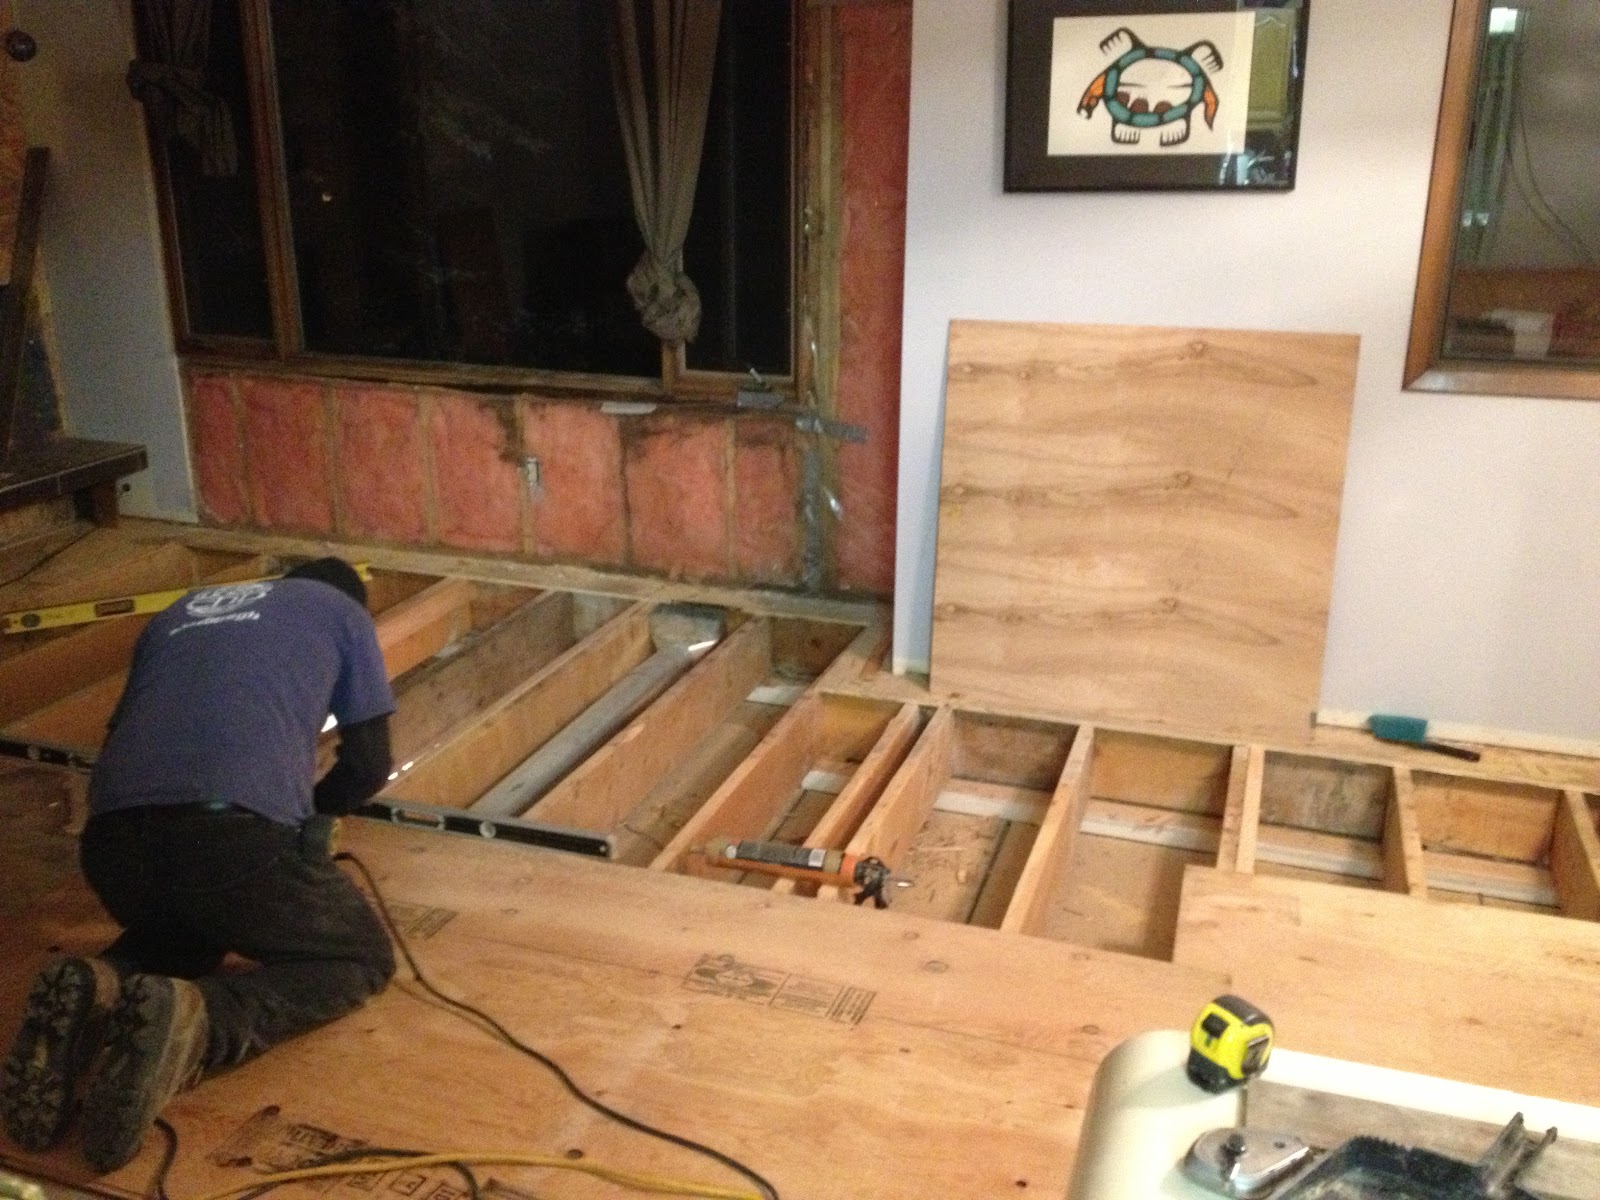
In the living room there was too much damage to let it slide. We had to replace huge chunks of the subfloor to deal with stains, warping and smell. There was a huge sag in the floor by the fireplace and there were places where it bounced. There was also crusty carpet underlay soaked in dog urine that would have taken way too long to scrape up. We chopped up about 4 sections like the above. 

Yuck!! We couldn't tell if it was dog urine or squirrels that had done this damage. There was another place where the squirrels had been removed. Either way, ICK! YUCK! BLECH

Very lucky to have a handy dandy husband with a lot of the tools and friends that got this job done in a hurry. He has the level out because the joists (long boards under the subfloor) were out by almost an inch. This is where the big sag/bouncy spot was. Fixed it up by sistering another board (attaching so they run parallel and are attached to each other for support) to get everything level. 

You might see the window with the drywall removed in the background. We investigated some mold that we found under the baseboards and realized that there was likely water coming in from the window. We were mostly right. We found insect damage behind the drywall under the window. We will eventually be replacing the window and re-framing the opening with wood that is not rotten. 


Flooring is just about done. It looks really nice to me! Of course that room was full of dog piss and 30 year old gross carpet not even 10 hours ago. 


Done! So much better. 


Monday, January 7, 2013

How to Clean your grease filter: Pinterest Journal

Pinterest Fail!

Well not exactly a fail I guess. It did do exactly what it was supposed to do. The pin in question is this lovely idea to boil up your greasy hood vent fans and remove all the yuck.

It is also quite likely that I went at this thing all wrong and the resulting mess was really my fault. I am not a clean and tidy person by nature, I'm a messy all over the place person and it's hard for me to instinctively go where a less mess version of whatever I'm doing might lie.

I think this idea goes back to the Manly Housekeeper although I'm sure he got it somewhere and then Jillee at One Good Thing posted about it and it got pinned and voila. Here I am.

So most people have a small, almost square, rectangular vent filter. I just happen to have two, extremely long, skinny rectangular filters so right off the hop I'm not going to get this done exactly right.

The idea is that you put on a pot of water, set to boil and add baking soda. Then you put your filter in the boiling water and it will effortlessly clean your filter for you.

Here is what my before/after picture looks like.


Here is a shot of one of the filters that I tried to clean next to the dirty one that had not been cleaned at all. The shiny silver part is cleaned (and really clean!) where the dingy brown parts are not cleaned. The stripe down the middle is there because I could not fit the whole thing in the pot. The second picture is of filter number 2 after also getting the treatment.

This last picture is a closer shot of the clean vs the dirty. It's a huge difference and the filter is almost as good as new. I could not help but wonder how much a new filter would have cost me, mostly because the effect of getting this sparkly "like-new" clean was that it looked like something from a TV crime lab was going down in my kitchen. It also smelled pretty gross. It made me a bit uncomfortable.


Here are some pictures of the process. I had seen a post about preventing boil overs by putting a chop stick across the top of the pot so I tried using a skewer to do the same thing. No luck. Boiled over a few times. So gross. 


So here you can see some pictures of the mess that was involved. The baking soda splatters came out of the pot and hit everywhere. Super easy to clean up but really disturbing to see. Especially when you look at what wicked little bits are floating around the pot. I'm so grossed out by this point that I'm trying to create a sneeze guard for the pot with a lid. There was a lot of this green/brown slime and only about 1/2 of the filter got cleaned.

It took me a little bit to clean up after all this smelly good times were wrapped up. Not as much as you might think because the baking soda cleaned up pretty easily and it helped clean the rest too.


So after all that, the environmentalist in me is feeling pretty righteous about keeping these two small pieces of metal out of the landfill. There is another part of me that wonders how much money I actually saved. Maybe 40$? 

I ran them both under some hot water for about 10 minutes to try and clean up the middle part. I poured baking soda on them and let them soak. I rinsed again. Not even nearly as good as you can see by the last picture. There is still a clear line where the treatment ended and where my 1/2 ass attempts to clean are not quite making it. 

Again not so glamourous. Not so easy peasy as the glossy pictures made it seem. I'm wondering now about the fantasy land that is my pinterest journal. I dream when I pin things. My hopes soar, inspirations lift. I'm starting to wonder if I'm based in reality at all. 


Saturday, January 5, 2013

Here We Go! Here We Go! Here We Go Again!

Here we go again..

So one of the less glamorous aspects of the constant renovation is that often there is tension, panic, frustration and even disappointment.

All of these ingredients can, by themselves, lead to arguing and rumblings and a general feeling of dissatisfaction.

The upswing is always that when a job is finished or going well, there is a sense of bonding and accomplishment. Shared adversary seems to bring about a real solid sense of love (or a solid sense of lack depending on the couple.)

More than one couple has ended over renovation fuelled troubles and my husband and I consider ourselves very fortunate in that we have 'survived' each other and will likely continue to survive. For us, for many reasons, this stuff is sometimes stressful and trying but not exactly the biggest thing we've ever had to endure. It is also how we are making our way in this world. We both have our eyes on the prize and one day we hope to build our own home, mortgage free. Wish us luck!

So, here we are again, in a house that is not quite a home. In a 1/2 done world of making-do and catching up when we can. Big messes, little messes, shabby attempts to mix is up a little where we can. Injections of fun and marathon building sessions.

I used to watch HGTV and think "that is so awesome! look at that transformation!" without a clue about what was happening behind the scenes. It's not just dusty, it's itchy and toxic. It's not just messy, it's never-ending mess that seems to float down from the ceiling for months. It's giant garbage bins, heavy loads of sharp and wobbly scraps of old and terribly gross-dirty items. It's random cuts and gauges on your fingers and arms. It's sore achy bones and no where to sit because you have had to move all your furniture out of the living room into the kitchen for the 3rd time this year. Lunch will be a minute hun I have to climb under the dining room table to get to the fridge.

Yeah that toilet from 1979? I'm carrying it like a baby down a flight of stairs hoping whatever just dripped on my leg was 'fresh' and avoiding eye contact with the giant yawning, flapping seat. It's happened. It has happened more than once. Let me tell you boys and girls sometimes it's not fresh and sometimes you just sledgehammered your shower in a frenzy of excitement without realizing it would not be back for weeks (days? hahah right!), yes weeks! Ty Pennington is no where in sight and you are only in the first leg of what will be a huge effort to "get your life back" followed by a period of "recovery" that will span months.


So here are some after shots of my kitchen.

Wasabi green island (kijiji 100.00, paint 60.00) with new butcher block from ikea (sale price 120.00)

Microwave was built-in for the sale of the house, we don't normally have one in the house. That space used to be occupied by assorted kid stuff but the microwave fit really nicely. 


We used remnants from our bathroom tile job to do the backsplash in the kitchen. We got a dishwasher and stove from kijiji for 500.00 although the stove needed repairs. New kitchen faucet from Canadian Tire from one of those one day blow-out sales. I believe it is a delta with a pull-out sprayer for 50.00. 


Inside view of the door that was installed to replace a window and now gives us a perfectly wonderful escape route to the deck on the other side. The header above the door was a bit big for my taste but it fit over all the demolition scars and felt right scale-wise for the cabinetry. Basically I didn't want to patch 3 inches of drywall so we just covered it up and this was what was required for that. Done!


Here is the view from the kitchen to the dining room. Kids are eating spaghetti and I'm swooning over my 'found' pendant. Famously free because I wore it as a hat and did a little dance in the store. The owner had it priced at 10.00 but I knew it was worth more. It was worth a hat dance. I love people. 

The floor is refinished here and to avoid a window treatment (strictly for privacy from the overlooking window on the neighbours house) I used some pantone colours projector sheets to create a bit of a stained glass effect on the top 1/2 of the windows. 

Sadly I got to enjoy this stage of the home building adventure for about 3 weeks before we sold the thing or 5 years later!. Most of the rest of the time it was in chaos and not what I would call user-friendly. 


Here are some more working shots. The old ikea butcher-block with an overhang, the shelf thing for kid junk, the irritating bar stool we always tripped on. The insulation I stared at for months. The dog dishes placed right where the kids could knock them over many times in a day. The empty dining room (for the 3rd time) getting refinished (we had moved into the basement for a few months). Yep. That's real reality for you.

This is where the arguments and the trouble can start. The real fun begins when you run out of money or you run out of materials. I had to wait for siding on our garage for a full year because we had to special order the hardie panels and they had a minimum to make it work.

Here are some more pictures of the fun.


There you have it. Evidence that my husband doesn't know how to change the toilet paper roll.  These are some pretty classy pictures of the only bathroom in the house being ripped to shreds.

That last statement isn't totally true because we had a second bathroom downstairs but we also had guests living down there and we only had the use of it for 2 months. Plenty of time for a bathroom reno you say? We said that too. Anyway we made sure to get the toilet working before it was too late but the shower was another month down the road.

Here is the after.


Nice! 

I got to enjoy this room for a full 6 months although the mirror and backsplash didn't make it until the last week before we put it on the market. 

It's rough. This is what I'm saying. Do not approach this lightly. Keep your optimism because it will allow you to go forward and do things that you might not have gotten into if you had known what would happen. Just realize that part of this renovation journey is going to be a lot like a marathon or child birth. The sucky part is right before the best feeling you are ever gonna get flooding through your viens and in a couple of months you are going to get the tickle to do it again. At least you will if you are anything like the junkies we are. 


Friday, January 4, 2013

Hey 2013 where is my hover board?

We moved! We sold the house and we moved. Hence the gap.


So we are here, again, in the middle of absolute chaos. I thought that I should post some of the great after shots of our former house. We ended up selling in 3 days with an accepted offer and a possession of 2 months. All super crazy and with a slow bumpy landing in our new digs. 

I've come to learn that you can do nothing on your own in the same speed or joyful spirit that you can do it with friends and family. 

I've also learned that we have a lot to learn!

I've decided that looking at all the wonderful blogs that I follow has given me a false sense of glamour. Maybe what we need up in here is a little bit of the real, you know what I'm saying?

So before I get all grimy and what not, here are some after shots of our former house. Maybe I spoke too soon. Maybe we are about to get a little grimy after all. 

Big thanks to all the wonderful people who helped us and supported us through a very tight transition into our new digs (pictures are in the pipe!). 


So let's call this the First House. 

bathroom in the midst of a total gut job

This is an in progress shot of the bathroom. We had just installed the new tub. It was super low and looked great. The good news with this project was that there was no black mold in the old gross tub suround. The bad news was that we uncovered some old black glue that was very likely to contain the asbestos we feared. 

We did not remediate the asbestos, we chose instead to cover it up. We raised the floor about 1/2 inch in the process but it was worth it. It allowed us to continue with our plan for heated floors. 


This is the realtor shot of our new bathroom. I'm sad that you can't see our lovely tiling job but I'll dig out some more pictures of that later on. 

My favourite parts of the bathroom remodel are not all here but this shot highlights the mirror (15.00 cut job on a reclaimed mirror), the glass tile backsplash that I got from a sample bin (free), the ikea 'as-is' Godmorgon vanity and the new ceramic tile floor we got on Kijiji for around 100.00 

The tub was a kijiji find as well (brand new -in box) for 75.00. The hooks and towel bar are also ikea but they might be considered vintage by now, we have had them forever. 

Missing from this photo is the tile, window ledge, bathtub fixtures, medicine cabinet, towel nook and the new lighting. 

This bathroom is making me crave the clean feeling we got from having finished this renovation. 


In the gut we replaced most of the drywall, installed heated flooring under the tile, cement board under the tub surround, insulation under the tub and re-plumbed the toilet (OMG that was scary) and the tub fixtures.  

We left everything where it was including the window and mostly worked around the layout. Shrinking the vanity and covering up the heat vent gave us the illusion of more floor space. We also kept the walls fairly bare to encourage light to bounce around. 

I love the 'cement' look/feel of the tile without the scary pour. We used a soft grey grout which also lent to the illusion of a solid floor. The heated floor was an amazing feature. One that I am determined to include in our new house. 

The radiant heat is so much nicer to come out of a shower too. No blowing air to give you goose bumps. 

still in progress but the grout is done. No mirror and the shot was taken at night. 


In progress with a temporary mirror, no grout in the glass tile backsplash and the thermostate/light switch dangling. The bar across the sink is soon to go in the cubbie for hooks. There is a plug-in inside the cubbie for hair dryers and the like. 


Here is the bathtub tile done, without grout. Truth be told I like the dark lines and if we ever do this size of subway tile again I think I will go dark with the grout. 


Just before we started the tile job. The blue board behind the tub is for waterproofing. You will notice that we tile a full tile after the tub line to increase the water proofing. 

This is a good example of what I am talking about when I saw 'practical' vs 'economic' vs 'photo worthy'. Some things that you do have to fall into one of those columns but the really satisfying stuff that you end up loving when you live there usually hits more than one. This was a super practical touch that was a bit more expensive but way worth it. The water never stops at the tub line and you often get 'rot' there where the drywall gets wet. I decided to extend it a bit and I was super happy with the results. It also helped to extend the tile right to the ceiling. Visually this gave you a feeling of a larger space, it allowed me to avoid some issues around the window and it just made sense. Who wants to be 'careful' all the time when you could crank the shower radio and rock out while washing your hair. 

The tub tile was also a kijiji find. 180 for all of the tile and I believe around 300 square feet. We didn't use it all and had plenty to work with for cut-offs and waste. the cubby was tiled in the same tile in the same pattern. White 2x6 tiles from dal-tile. 


Monday, September 24, 2012

A Celebration of Before/After Shots!

Here are some before/after shots from our old house.

The sale went through and we are just wading through a few bits before we hand over the keys on Friday.

In the spirit of change. Here are some super changes.


We replaced the window in the kitchen with a sliding door that gave us direct access to the back deck. This turned out to be a pretty simple demolition project and for some reason the door we scored fit perfectly in the the hole we cut out. EVERYONE stepped back and gave a little 'huh?' because we are all really used to having things go a little sideways. 

TIP: This window size fit our new door perfectly so we did not need a permit for the work (therefore no inspection). If your door is even 1 inch bigger than the original opening you will need to seek out a permit and follow all building code requirements to ensure structural safety. You can make the door smaller than the original opening without needing to jump through those permit hoops. At least this is the story in AB. 

COST of project: 
F&F discount labour. 0$
Saws All Blades 20.00
Special Masonry Blade for Saw: 50.00
Weatherproofing: Used left-overs from garage
Door: Re-used. 

Total: >100.00

TIME for project:
2 days for the initial demo/build. 
4 months to eventual finish up the casing on the outside. 
1 year to eventually re-do the deck to make this a finished project. 

We spent nothing on this one. I know right? This one project made the biggest difference in my life as it gave me and the kids easy access to outside. The price-tag is so low because we used friends and family to help with the demo and install, we had the tools that we needed already (we just needed the specialized blades) and because we recovered the 1500 door from our neighbours who were putting in a sunroom. Recycling works! The door is a little worn in but my kids would have made short work of the new door anyway. 


If you ignore my test swatches this looks a million times better and is super functional. My favourite project. 


Wednesday, September 19, 2012


We are officially there! Right in the middle of a tidal chaos that will pull back revealing that everything has changed. I'm dreading the end result and sitting on the edge of the bed hugging my knees and biting my nails.

This is not the first time in my life that I have said "If I knew what was coming, like really knew, I would not have signed up." However! I am so glad I went for it. My husband and I have really done something amazing for our lifestyle and our family's existence. I can't wait to share it with you.

So to get started, I should explain a few things. 7 years ago we bought a house will a plan of renovating it within 5 years and moving on to a new 'flip'. As anyone who decides to have children will tell you, stuff changes. It changes in ways you don't anticipate, can't prepare for and have absolutely no idea about in your life as an individual person. We have spent the last 4 year years in an unhappy state of things, due to the economic shifts, my son's health concerns and a few changes in our financial ability to continue work on the home.

The cruel, wonderful thing about this world is that necessity really is the mother of invention and until we were pushed to the absolute crazy limits we had no idea what we were capable of doing. There have been some times where we were close to collapse and surrender but there was a few points where we just had to make some risky choices to get ourselves into a better situation.

I would like to share some of the journey we have been on and document the path we have currently decided to take. It's pretty exciting and I want everyone to know, it's super hard but totally worth it.


Wednesday, April 4, 2012

Renovation: Before and After

Here is a shot of our newly refinished floor.

Before and After.

We chose a natural finish with satin gloss. Super happy with the look.